This guide provides a step-by-step procedure for performing an ABPM test using Amedtec ECGpro with LEMR integration to Best Practice (Bp Premier). ECGpro is only compatible with Amedtec branded ABPM devices.
If you have already programmed the recorder, and the patient has come back to import the results from the device, go to the Download Data from the Recorder section. Otherwise, always start at the Program the Recorder section below.
The instructions below are designed for LEMR version 2023.10.9.1642 and later. If instructions for earlier versions are required, please contact LEMR Support.
Before you begin: ensure you have fully charged, good quality batteries in your ABPM device!
Either use brand new disposable batteries or use good quality, fully charged rechargeable batteries. Failure to do so may result in the device powering off in the middle of the 24 hour monitoring process.
¶ Program the Recorder
1. Open the patient’s file in Best Practice (Bp Premier).
2. Make sure the patient’s height and weight information is up to date.

3. Go to the Utilities menu and select Blood Pressure.

4. Choose a specific LEMR Client computer to start the test on.

5. While the test is in progress, a window will be displayed over Best Practice. LEMR Client will pop up over the top.

Are you stuck on this test in progress window? If so, please click here for help troubleshooting this issue.
6. LEMR Client should then ask if you would like to start the scheduled test. Choose ECGpro.

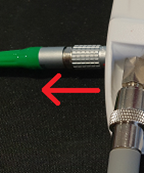
7. On-screen instructions to connect your AMEDTEC ABPM (Holter-RR) device to your computer will appear on the screen. Start by connecting the round plug into the side of the ABPM device.
|
WARNING - Be gentle with the round plug on the side; the small pins inside can easily be damaged!  Line the two red dots up before pushing the cable into the socket. Gently push it directly in until there is a satisfying click sound and it locks into place – do not rotate the plug! 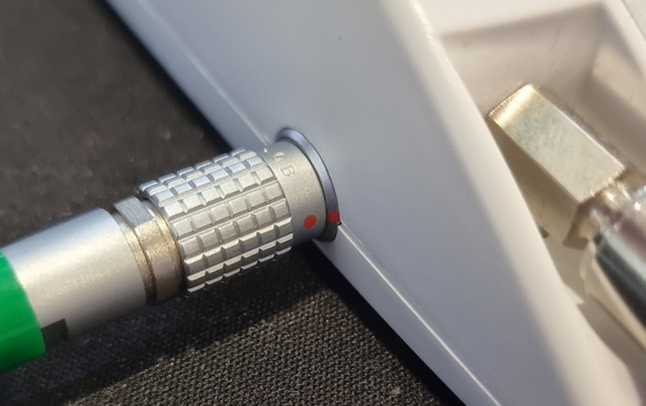 |
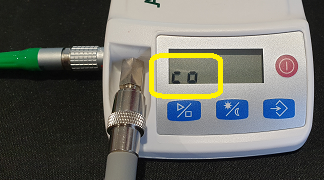
8. Turn on the AMEDTEC ABPM (Holter-RR) by pressing the red power button.
You should see “co” on the screen of the device indicating that it is connected. A device found message should appear then ECGPro will open.

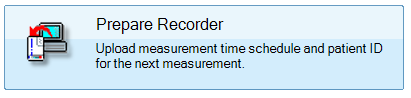
9. Click on Prepare Recorder.
10. Adjust the day/night time intervals as required and click Transmit, and activate the selected protocol.
|
If asked to clear the memory of the ABPM device, click Yes. This will only appear if there are measurements still saved on the device.  WARNING: Clearing the recorder's memory is important to do before starting a new test, though if there is any data on the device that you have not yet downloaded, click No then go through the process to download that data from the device. After this, you can start over to program the device. If you fail to clear the recorder's memory and it eventually runs out of space, you will start receiving an Error 7 on the device, which is defined in the Amedtec Holter-RR Manual as follows: The recorder memory has reached the maximum number of 300 measurements (incl. events). No more measurements can be stored. |
After clicking OK on the above message, the ECGpro software should automatically close. If not, close any open ECGpro windows only (not LEMR) and the process will continue.
11. The ABPM Programming Finished window will appear. Review the message on screen then click OK.

12. Disconnect your AMEDTEC ABPM (Holter-RR) device from your computer, place the ABPM cuff on the patient and the recorder into the pouch.
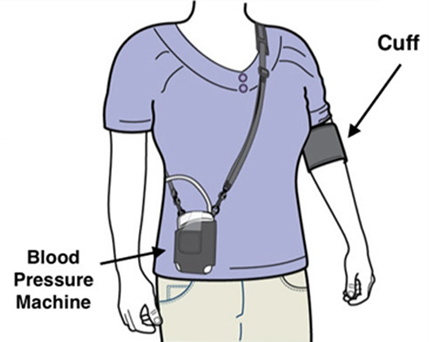
| Follow the instructions printed on the cuff for placement. The pressure tube must go up and over the shoulder. Also make sure the cuff is 2 to 3cm from the arm joint. Also make sure you can fit two fingers between the cuff and the patient’s arm. |
13. Press the Play button on the recorder to start the first test – the automatic schedule will begin after this first manual test is complete.

¶ Download Data from the Recorder
Follow this procedure when the patient returns after 24 hours of testing.
1. In Best Practice (Bp Premier), open the patient’s file where the ABPM report will be imported.
2. Go to the Utilities menu and select Blood Pressure.
3. Choose a specific LEMR Client computer to import the test on and click OK.
4. While the test is in progress, a window will be displayed over Best Practice. LEMR Client will pop up over the top.
Are you stuck on this test in progress window? If so, please click here for help troubleshooting this issue.
5. LEMR Client should appear asking if you would like to start the scheduled test. Choose ECGpro.
6. On-screen instructions to connect your AMEDTEC ABPM (Holter-RR) device to your computer will appear on the screen. Start by connecting the round plug into the side of the ABPM device.
|
WARNING - Be gentle with the round plug on the side; the small pins inside can easily be damaged! Line the two red dots up before pushing the cable into the socket. Gently push it directly in until there is a satisfying click sound and it locks into place – do not rotate the plug! |
7. Turn on the AMEDTEC ABPM (Holter-RR) by pressing the red power button.
You should see “co” on the screen of the device indicating that it is connected. A device found message should appear then ECGPro will open.
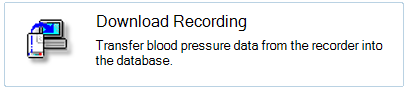
8. In the AMEDTEC software, click on Download Recording.
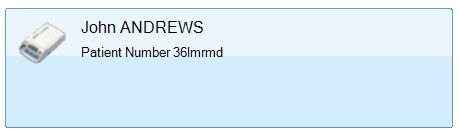
9. Click on the big button with the patient’s name on it – there should only be one to click on, contact support if there are two items in the list.
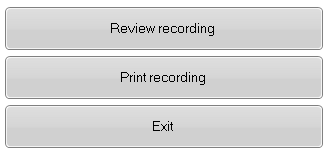
10. Click either Review recording, Print recording or Exit as required.
After clicking Exit on the above message, the ECGpro software should automatically close. If not, or if you choose any other option, be sure to close any open ECGpro windows only (not LEMR) and the process will continue.
11. When the LEMR Client window pops up, the test should be made ready for Best Practice to collect - the test icon will go from an uploading icon to a circled tick.

12. LEMR Server will detect the finished test and automatically import it into Best Practice. The imported test will be stored in Clinical Images. Click OK.

¶ Additional Information
More information about ECGpro can be found on the LEMR Wiki.
For more information about AMEDTEC Holter-RR 24-Hour ABPM device error codes, troubleshooting and maintenance information, click here: https://wiki.lemr.com/en/support/technical-support/amedtec-abpm-device-error-codes